• Fusion imaging,  X-Ray

    Spider conch X-ray fusion photo

    A friend gave me a shell of a spider conch to make more fusion images. The scientific name of the spider conch is lambis lambis and it is a sea snail. There is a nice Wikipedia article on it.

    The hard shell with a lot of radiopaque lime made me doubt the success of my X-rays. On top, my first attempt at a HighKey image wasn’t really convincing. Only the combination of a normal photography for the color, a HighKey image for a transparency effect together with the X-ray image resulted in nice image.

    Fusion image spider conch X-ray and photo seen from the bottom © Julian Köpke
    Fusion image spider conch (lambis lambis) X-ray and photo seen from above © Julian Köpke
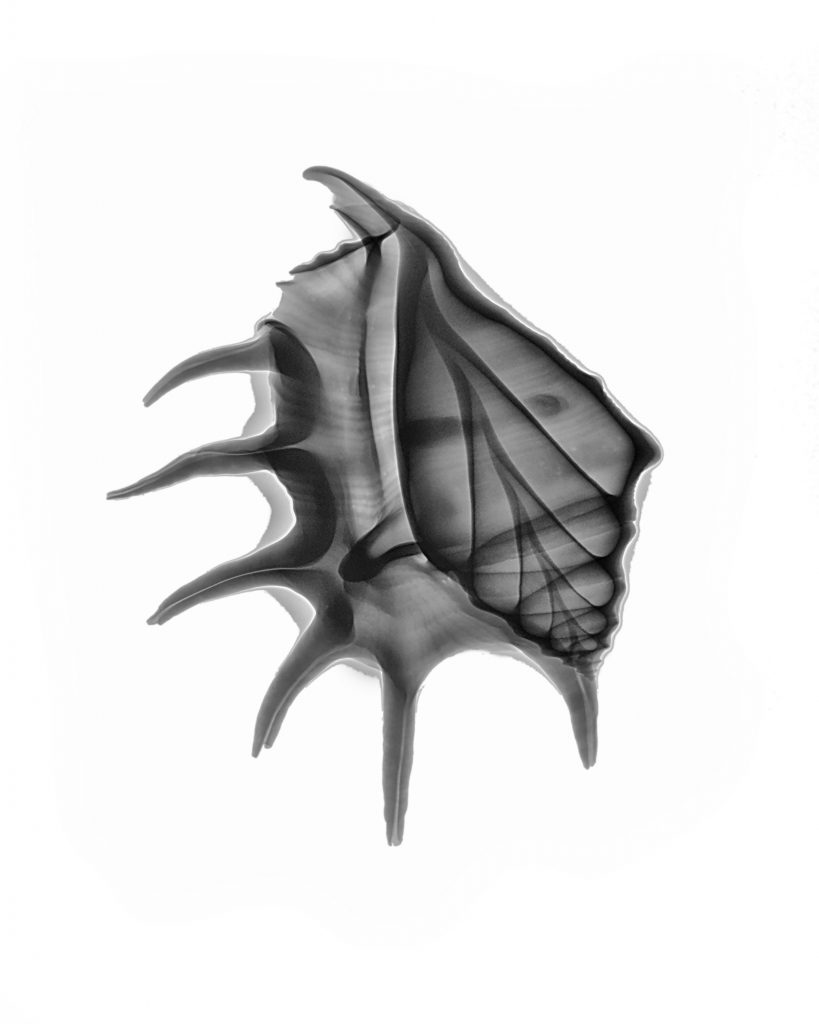
    The X-ray image appear less lively, but full of formal power. The orientation of the animal is conveyed by the photographically reproduced color. There are only minimal hints wich orientation the X-ray has.

    These are the corresponding X-ray images:

    Spider conch (lambis lambis) © Julian Köpke
    Spider conch (lambis lambis) © Julian Köpke
  • flowers,  Fusion imaging,  Lightbox,  X-Ray

    Orchid X-ray fusion photo

    It feels like very long ago. Harold and I were taking the shots and X-rays of new compositions last week of  April this year. Our first try was an orchid with two stems. The transparency effect is very much augmented using an X-ray. A stem behind petals doesn’t show easily in HDR light box photography.

    With a Phase One camera at my disposal a strong crop of the composition shows the tenderness of our orchid much better. With a resolution still sufficient.

    Orchid fusion X-ray photo © Julian Köpke
  • Travel,  X-Ray

    Leipzig X-ray Convention

    Since 1905 there is an X-ray meeting in Germany. It was the 100th time this year. Nowadays the convention takes place every year.

    Besides the scientific news the convention offers the opportunity of caring for personal contacts. It is part of the beautiful things of the convention to meet old acquaintances and to exchange with them.

    Leipzig fair is a great environment for this event. An agreeable tiredness affects me at the end of the day after many positive conversations. I left the celebration with relief.

    Leipzig fair at sunset © Julian Köpke
  • flowers,  Fusion imaging

    Purple Clematis

    Long lasting blossoms, turning up every year: my purple clematis in our garden.

    It was my third X-ray session with flowers this week. Third fusion imaging attempt. After blue cornflower and blue aquilegia now a purple clematis. Big data on my hard disk.

    Today we did it with mammography at 30 kV and 50 mAs. Lower noise ! Here is the positive representation of a single clematis:

    Clematis X-ray photo © Julian Köpke

    I processed the lightbox HighKey series with a mask. There was a shift of 2 or 3 pixels from the lightest to the darker images. So I processed everything a second time to compensate for the shift. The HDR image shows a cut stalk. Photoshop is made for this.

    Purple Clematis © Julian Köpke

    The stalk can be lengthened like in the preceding X-ray. The fusion image shows hidden leaves, the core of the blossom and stalks much better:

    Purple Clematis X-ray fusion photo © Julian Köpke

    The flower looks pretty fragile now, close to its natural appearance.

  • Fusion imaging,  Lightbox,  X-Ray

    Spring and X-ray fusion photos

    First flowers in spring show up. With much support from my colleagues I’m able to do some fusion images. We all would like to have another calendar.

    Preparing the lightbox, the X-ray machines, my camera and picking out the data is a bunch of hassle.

    My personal favorite is the blue cornflower. It looks like a print of an old botanic book:

    Cornflower X-ray fusion photo © Julian Köpke

    The next day I turned my attention to our white and blue Aquilegias. No chance to process the raw data yesterday. Eventually, there was a chance today, after quite a bit of tedious work at my desk:

    Blue aquilegia X-ray fusion photo © Julian Köpke
  • X-Ray

    Gradients and X-ray tubes

    Fusion imaging is a method full of surprise. My red calla lilies revealed an effect I had forgotten completely. There must be a gradient in every X-ray exposure.

    Preparing a fusion image composition with my 6 red calla lilies I found a troublesome gradient in the X-ray. 

    Gradient in an X-ray of 6 red calla lilies © Julian Köpke

    The cause for the gradient is a weakening of X-ray radiation at its origin in the X-ray tube. A closer look at the phenomenon can be found in my FAQ. This effect of variable recording of photons phycisists call „anode heel effect“.

    As part of my creative process I rotated the composition shown above by 180 degrees and exposed it a second time with the same parameters. Note that post-production as well was done equally for both X-ray exposures !

    Gradient in an X-ray of 6 red calla lilies, inverted for creative reasons © Julian Köpke
  • FAQ: Gradients

    It has been a long time since I thought about the basic properties of X-Ray tubes in graduate school. But I stumbled over an effect the other day that reminded me of one of these properties while using my new digital x-ray system. When I looked at this x-ray capture of six calla lilies, it was immediately clear that the system had operated in a way I had not entirely expected.

    The background of the calla lily x-ray shows a gradient of deep black values at the top of the image ranging to intermediate gray values at the bottom. This was surprising. 

    At first I suspected a problem caused by the sensor. But after a little reflection, I realized this was not the case. It was not a bug, it was a feature !

    Darker values in an X-ray film exhibit higher intensities of X-ray photons. Lower gray values mean lower intensities. Reading a bit more thoroughly about properties of X-rays and their production, the reason for the phenomenon became apparent to me. As the image of calla lilies shown above demonstrates, the distribution of X-rays emerging of a X-ray tube is not homogenous.

    X-rays are produced by accelerating electrons towards the anode of an X-ray tube. The anode is made of metal in the shape of a plate. The applied electric voltage to the anode is positive and the negative charged electrons fly therefore straight into the anode. A magnification of this process is shown on the following plan:

    Creation ox X-rays at the anode of an X-ray tube © Julian Köpke

    The path of the electrons is about 6 – 8 cm long. About 1% of the braking energy in return is transformed into X-rays. 99% is heat production in the anode. The most common construction type of X-ray tubes in the medical diagnostic field is therefore constructed with a very rapid spinning anode to expel the heat.

    The focal point on an anode is not a mathematical point. It is more like a circle (an even close model is an ellipse with a diameter of about 4 -5 mm). After electrons have entered the anode material and are slowed down, X-ray radiation leaves the edge of the plate. As the anode has an edge formed as an inclined plane, some X-ray photons can move freely, others have to pass a little more through the material of the anode. The longer the path of the photons through the anode is, the weaker the radiation’s intensity and the less is the sensor black. This effect of variable recording of photons by the anode plate is called „anode heel effect“. You can find more information on this topic in a Wikipedia article.

    The described gradient on an X-ray exposure can be used creatively. Before looking at these creative possibilities, note that it is easy to use post-production tools such as Photoshop to compensate for the gradient.  Medical diagnostic digital X-ray systems are already using something similar to compensate for the gradient.

    Using the gradient that is generated creatively means taking control of the process. For example, by rotating the composition shown above by 180 degrees and exposing it a second time you get soft contrast in the calla lily blossoms and a “hard” contrast in the rendition of the stalks (see image below). For comparison, in the medical field an appropriate exposure would use the higher X-ray photon intensity at the bottom for structures that are more dense on one side only (for example, the heel of the foot). Note that acquisition (x-ray exposure) and post-production were done equally for both X-ray exposures !

    Heel effect in X-ray photo of Calla lilies © Julian Köpke

    Any rotational position can be thought of to integrate this effect in an image. The only limitation is the X-ray lighting area.

  • X-Ray

    Red calla lilies

    Sometimes reality falls behind our expectations. With 6 red calla lilies I felt well prepared to do some new X-rays and HDR images for image fusion. But my X-ray system surprisingly raised a barrier. The main computer stopped doing his job. 

    Many thoughts ran through my brain. Will we be able to examine patients the next day ? How fast the supplier will be able to react ? Will the company find a cause of this disturbance ? How many days will my calla lilies be alive ?

    I found a work-around by thinking over the interacting hardware. Doing some steps and with a newly restarted system I was able to create 7 different compositions without further disruption of which I show here No. 4.

    With X-rays emerges a more impressive illusion of transparency than a plain HDR would have been able to produce. Even when using a lightbox.

    Similar to a lightbox it produces better results when laying a petal or a complete blossom over the top of the stalk of another one.

    On top of the longest stalk is a twin blossom !

    Fusion X-ray photo Calla lilies IV © Julian Köpke

    You never know if the inversion in Lab colors leads to an attractive result. It’s always worth looking at Lab color transformations. In this case the black background yields vivid colors.

    Fusion X-ray photo Calla lilies IV. Black background using Lab inversion. © Julian Köpke
  • X-Ray

    X-ray exam of stone age tusk

    A couple of days ago I went to see a friend who knows my weakness for X-ray examinations. He gave me a mammoth tusk. At first glance I doubted if there would be any possibility to produce an image because of the estimated high density of this stone age tooth.

    So I decided to try a CT scan. I had some butterflies in my tummy and feared an artistic disaster. Indeed, the first slices emerging from our scanner weren’t much convincing. As a first step of postproduction My technician and I decided to do a volume rendering of the 0.75mm slices. We got a surprisingly good result that showed interesting details of the inner structure of this biological remnant.

    Tip of a mammoth tusk (CT scan, VRT and Photoshop) © Julian Köpke

    A tusk is a tooth of the upper jaw of the mammoth (or elephant). A major blood vessel branching off while running to the tip can easily be seen. The caves on right hand side are assumed to stabilize this life long weapon of a mammoth.

    This tusk has been stone age ivory and consists mostly of calcium phosphate and calcium carbonate.

    As there is no restriction to trading of mammoth ivory there is an increasing amount of siberian stone age ivory emerging to the market.